Showing posts with label template. Show all posts

Wednesday, January 05, 2011

Test removing post footer timestamp


A blogger removed the time stamp and now wants it back. Here is my effort to identify which part of the template may be responsible for displaying the time stamp. Here I describe how I went about to try to locate those codes for the time stamp
1. Dashboard > Design > Edit HTML > Expand Widget Template
2. Ctrl+F and searched for post-footer
3. Found these codes:

<span class='post-timestamp'>
<b:if cond='data:top.showTimestamp'>
<data:top.timestampLabel/>
<b:if cond='data:post.url'>
<a class='timestamp-link' expr:href='data:post.url' rel='bookmark' title='permanent link'><abbr class='published' expr:title='data:post.timestampISO8601'><data:post.timestamp/></abbr></a>
</b:if>
</b:if>
</span>


4. Without deleting anything, click PREVIEW and noted that time stamp at post footer (highlighted with red rectangle below)

Blogger post footer with timestamp highlighted

5. Now the codes identified above was deleted and the PREVIEW button clicked again and the following was the result

Blogger post footer minus timestamp highlighted

Note that where there used to be a timestamp, now the position of the missing timestamp is highlighted by the red arrow.

Thus this test has identified that the codes above is responsible for displaying the timestamp which can be removed by deleting those codes. However since I have no intention to delete the timestamp, I clicked CLEAR EDIT and everything is back to as original.

But for the blogger who wants back her timestamp, I suppose she can experiment inserting those codes above into the relevant post-footer section of the template and preview to see if the timestamp is displayed for her blog.

Tuesday, November 23, 2010

Blogger Tips and Tricks Youtube video channel

Am going to experiment with Youtube video channel, creating one for my main blog, Blogger Tips and Tricks and starting with a simple screen capture of what happens to a blog with a fixed width template when the screen resolution (width) changes. The video below shows a horizontal scroll bar when the screen width is below 1024px but the horizontal scroll bar disappear when the screen width is wider than 1024px. This video helps explain my post on optimizing template for majority visitors at Blogger Tips and Tricks is now 4 column and the earlier Blogger for Dummies is now 3 column:

Saturday, February 10, 2007

How to get a template for a blog with only a main column and no sidebar

Assuming that you are using Douglas Bowman Minima two column template, sign into Dashboard, choose the blog and click Layout, then click the TEMPLATE > EDIT HTML tabs to open the template editor window.

First, backup your template by clicking DOWNLOAD FULL TEMPLATE and save it in a suitable folder with a suitable file name.

Then look for the following block of codes:

#header-wrapper {
width:660px;
margin:0 auto 10px;
border:1px solid $bordercolor;
}

Change it to

#header-wrapper {
width:750px;
margin:0 auto 10px;
border:1px solid $bordercolor;
}

Look further down for this block of codes

#outer-wrapper {
width: 660px;
margin:0 auto;
padding:10px;
text-align:left;
font: $bodyfont;
}

Change it to

#outer-wrapper {
width: 750px;
margin:0 auto;
padding:10px;
text-align:left;
font: $bodyfont;
}

Look further down the template for this block of codes:

#main-wrapper {
width: 410px;
float: left;

Change it to

#main-wrapper {
width: 750px;
float: left;

Look further down the template for this block of codes:

#sidebar-wrapper {
width: 220px;
float: right;
word-wrap: break-word; /* fix for long text breaking sidebar float in IE */
overflow: hidden; /* fix for long non-text content breaking IE sidebar float */
}

Delete it.

Preview the template, and if satisfied, save the template

Friday, October 06, 2006

Template of a Blogger Beta template with "Expand widget template" ticked

Someone on the Google Blogger Help have expressed a desire to have a look at the beta template before deciding to shift. So I am going to oblige by posting the template of this blog below. There will be two templates, a simpler one with the "Expand Widget Template" not ticked image . Below that will be a longer template which you will normally use when you need to edit your template for customization, which you get by ticking the "Expand Widget Template" image

Blogger Beta template with "Expand Widget Template not ticked


<?xml version="1.0" encoding="UTF-8" ?>
<!DOCTYPE html PUBLIC "-//W3C//DTD XHTML 1.0 Strict//EN"

"http://www.w3.org/TR/xhtml1/DTD/xhtml1-strict.dtd">
<html xmlns='http://www.w3.org/1999/xhtml' xmlns:b='http://www.google.com/2005/gml/b'

xmlns:data='http://www.google.com/2005/gml/data' xmlns:expr='http://www.google.com/2005/gml/expr'>
<head>
<title><data:blog.pageTitle/></title>
<b:include data='blog' name='all-head-content'/>
<b:skin><![CDATA[/*
------------------------------------------------
Blogger Template Style
Name: Minima
Designer: Douglas Bowman
URL: www.stopdesign.com
Date: 26 Feb 2004
Updated by: Blogger Team
------------------------------------------------ */

/* Variable definitions
====================
<Variable name="bgcolor" description="Page Background Color"
type="color" default="#fff" value="#ffffff">
<Variable name="textcolor" description="Text Color"
type="color" default="#333" value="#333333">
<Variable name="linkcolor" description="Link Color"
type="color" default="#58a" value="#5588aa">
<Variable name="pagetitlecolor" description="Blog Title Color"
type="color" default="#666" value="#666666">
<Variable name="descriptioncolor" description="Blog Description Color"
type="color" default="#999" value="#999999">
<Variable name="titlecolor" description="Post Title Color"
type="color" default="#c60" value="#cc6600">
<Variable name="bordercolor" description="Border Color"
type="color" default="#ccc" value="#cccccc">
<Variable name="sidebarcolor" description="Sidebar Title Color"
type="color" default="#999" value="#999999">
<Variable name="sidebartextcolor" description="Sidebar Text Color"
type="color" default="#666" value="#666666">
<Variable name="visitedlinkcolor" description="Visited Link Color"
type="color" default="#999" value="#999999">
<Variable name="bodyfont" description="Text Font"
type="font" default="normal normal 100% Georgia, Serif" value="normal normal 100% Georgia,

Serif">
<Variable name="headerfont" description="Sidebar Title Font"
type="font"
default="normal normal 78% 'Trebuchet MS',Trebuchet,Arial,Verdana,Sans-serif"

value="normal normal 78% 'Trebuchet MS',Trebuchet,Arial,Verdana,Sans-serif">
<Variable name="pagetitlefont" description="Blog Title Font"
type="font"
default="normal normal 200% Georgia, Serif" value="normal normal 200% Georgia, Serif">
<Variable name="descriptionfont" description="Blog Description Font"
type="font"
default="normal normal 78% 'Trebuchet MS', Trebuchet, Arial, Verdana, Sans-serif"

value="normal normal 78% 'Trebuchet MS', Trebuchet, Arial, Verdana, Sans-serif">
<Variable name="postfooterfont" description="Post Footer Font"
type="font"
default="normal normal 78% 'Trebuchet MS', Trebuchet, Arial, Verdana, Sans-serif"

value="normal normal 78% 'Trebuchet MS', Trebuchet, Arial, Verdana, Sans-serif">
*/

/* Use this with templates/template-twocol.html */

body {
background:$bgcolor;
margin:0;
color:$textcolor;
font:x-small Georgia Serif;
font-size/* */:/**/small;
font-size: /**/small;
text-align: center;
}
a:link {
color:$linkcolor;
text-decoration:none;
}
a:visited {
color:$visitedlinkcolor;
text-decoration:none;
}
a:hover {
color:$titlecolor;
text-decoration:underline;
}
a img {
border-width:0;
}

/* Header
------------------------------------------------
*/

#header-wrapper {
width:660px;
margin:0 auto 10px;
border:1px solid $bordercolor;
}

#header {
margin: 5px;
border: 1px solid $bordercolor;
text-align: center;
color:$pagetitlecolor;
}

#header h1 {
margin:5px 5px 0;
padding:15px 20px .25em;
line-height:1.2em;
text-transform:uppercase;
letter-spacing:.2em;
font: $pagetitlefont;
}

#header a {
color:$pagetitlecolor;
text-decoration:none;
}

#header a:hover {
color:$pagetitlecolor;
}

#header .description {
margin:0 5px 5px;
padding:0 20px 15px;
max-width:700px;
text-transform:uppercase;
letter-spacing:.2em;
line-height: 1.4em;
font: $descriptionfont;
color: $descriptioncolor;
}


/* Outer-Wrapper
------------------------------------------------ */
#outer-wrapper {
width: 750px;
margin:0 auto;
padding:10px;
text-align:left;
font: $bodyfont;
}

#main-wrapper {
width: 400px;
margin-left: 20px;
float: left;
word-wrap: break-word; /* fix for long text breaking sidebar float in IE */
}

#sidebar-wrapper {
width: 150px;
float: right;
word-wrap: break-word; /* fix for long text breaking sidebar float in IE */
}

#newsidebar-wrapper {
width: 150px;
float: left;
word-wrap: break-word; /* fix for long text breaking sidebar float in IE */
}


/* Headings
------------------------------------------------ */

h2 {
margin:1.5em 0 .75em;
font:$headerfont;
line-height: 1.4em;
text-transform:uppercase;
letter-spacing:.2em;
color:$sidebarcolor;
}


/* Posts
------------------------------------------------
*/
h2.date-header {
margin:1.5em 0 .5em;
}

.post {
margin:.5em 0 1.5em;
border-bottom:1px dotted $bordercolor;
padding-bottom:1.5em;
}
.post h3 {
margin:.25em 0 0;
padding:0 0 4px;
font-size:140%;
font-weight:normal;
line-height:1.4em;
color:$titlecolor;
}

.post h3 a, .post h3 a:visited, .post h3 strong {
display:block;
text-decoration:none;
color:$titlecolor;
font-weight:normal;
}

.post h3 strong, .post h3 a:hover {
color:$textcolor;
}

.post p {
margin:0 0 .75em;
line-height:1.6em;
}

.post-footer {
margin: .75em 0;
color:$sidebarcolor;
text-transform:uppercase;
letter-spacing:.1em;
font: $postfooterfont;
line-height: 1.4em;
}

.comment-link {
margin-left:.6em;
}
.post img {
padding:4px;
border:1px solid $bordercolor;
}
.post blockquote {
margin:1em 20px;
}
.post blockquote p {
margin:.75em 0;
}

/* Comments
------------------------------------------------ */
#comments h4 {
margin:1em 0;
font-weight: bold;
line-height: 1.4em;
text-transform:uppercase;
letter-spacing:.2em;
color: $sidebarcolor;
}

#comments-block {
margin:1em 0 1.5em;
line-height:1.6em;
}
#comments-block .comment-author {
margin:.5em 0;
}
#comments-block .comment-body {
margin:.25em 0 0;
}
#comments-block .comment-footer {
margin:-.25em 0 2em;
line-height: 1.4em;
text-transform:uppercase;
letter-spacing:.1em;
}
#comments-block .comment-body p {
margin:0 0 .75em;
}
.deleted-comment {
font-style:italic;
color:gray;
}

#blog-pager-newer-link {
float: left;
}

#blog-pager-older-link {
float: right;
}

#blog-pager {
text-align: center;
}

.feed-links {
clear: both;
line-height: 2.5em;
}

/* Sidebar Content
------------------------------------------------ */
.sidebar {
color: $sidebartextcolor;
line-height: 1.5em;
}

.sidebar ul {
list-style:none;
margin:0 0 0;
padding:0 0 0;
}
.sidebar li {
margin:0;
padding:0 0 .25em 15px;
text-indent:-15px;
line-height:1.5em;
}

.sidebar .widget, .main .widget {
border-bottom:1px dotted $bordercolor;
margin:0 0 1.5em;
padding:0 0 1.5em;
}

.main .Blog {
border-bottom-width: 0;
}


/* Profile
------------------------------------------------ */
.profile-img {
float: left;
margin: 0 5px 5px 0;
padding: 4px;
border: 1px solid $bordercolor;
}

.profile-data {
margin:0;
text-transform:uppercase;
letter-spacing:.1em;
font: $postfooterfont;
color: $sidebarcolor;
font-weight: bold;
line-height: 1.6em;
}

.profile-datablock {
margin:.5em 0 .5em;
}

.profile-textblock {
margin: 0.5em 0;
line-height: 1.6em;
}

.profile-link {
font: $postfooterfont;
text-transform: uppercase;
letter-spacing: .1em;
}

/* Footer
------------------------------------------------ */
#footer {
width:660px;
clear:both;
margin:0 auto;
padding-top:15px;
line-height: 1.6em;
text-transform:uppercase;
letter-spacing:.1em;
text-align: center;
}

/** Page structure tweaks for layout editor wireframe */
body#layout #header {
margin-left: 0px;
margin-right: 0px;
}
]]></b:skin>
</head>

<body>
<div id='outer-wrapper'><div id='wrap2'>

<!-- skip links for text browsers -->
<span id='skiplinks' style='display:none;'>
<a href='#main'>skip to main </a> |
<a href='#sidebar'>skip to sidebar</a>
</span>

<div id='header-wrapper'>
<b:section class='header' id='header' maxwidgets='3' showaddelement='yes'>
<b:widget id='Header1' locked='false' title='Testing Blogger Beta (Header)' type='Header'/>
<b:widget id='HTML6' locked='false' title='' type='HTML'/>
</b:section>
</div>

<div id='content-wrapper'>
<div id='newsidebar-wrapper'>
<b:section class='sidebar' id='newsidebar' preferred='yes'>
<b:widget id='HTML3' locked='false' title='' type='HTML'/>
<b:widget id='HTML9' locked='false' title='' type='HTML'/>
<b:widget id='HTML7' locked='false' title='' type='HTML'/>
<b:widget id='Profile1' locked='false' title='About Me' type='Profile'/>
</b:section>
</div>

<div id='main-wrapper'>
<b:section class='main' id='main' showaddelement='no'>
<b:widget id='HTML5' locked='false' title='' type='HTML'/>
<b:widget id='Blog1' locked='false' title='Blog Posts' type='Blog'/>
</b:section>
</div>

<div id='sidebar-wrapper'>
<b:section class='sidebar' id='sidebar' preferred='yes'>
<b:widget id='HTML2' locked='false' title='' type='HTML'/>
<b:widget id='HTML1' locked='false' title='' type='HTML'/>
<b:widget id='Label1' locked='false' title='Labels' type='Label'/>
<b:widget id='BlogArchive1' locked='false' title='Blog Archive' type='BlogArchive'/>
<b:widget id='LinkList1' locked='false' title='Blogger Resources' type='LinkList'/>
</b:section>
</div>

<!-- spacer for skins that want sidebar and main to be the same height-->
<div class='clear'> </div>

</div> <!-- end content-wrapper -->

<div id='footer-wrapper'>
<b:section class='footer' id='footer'>
<b:widget id='HTML8' locked='false' title='' type='HTML'/>
<b:widget id='HTML4' locked='false' title='' type='HTML'/>
</b:section>
</div>

</div></div> <!-- end outer-wrapper -->
</body>
</html>


Blogger Beta template with "Expand Widget Template" ticked


<?xml version="1.0" encoding="UTF-8" ?>
<!DOCTYPE html PUBLIC "-//W3C//DTD XHTML 1.0 Strict//EN"

"http://www.w3.org/TR/xhtml1/DTD/xhtml1-strict.dtd">
<html xmlns='http://www.w3.org/1999/xhtml' xmlns:b='http://www.google.com/2005/gml/b'

xmlns:data='http://www.google.com/2005/gml/data' xmlns:expr='http://www.google.com/2005/gml/expr'>
<head>
<title><data:blog.pageTitle/></title>
<b:include data='blog' name='all-head-content'/>
<b:skin><![CDATA[/*
------------------------------------------------
Blogger Template Style
Name: Minima
Designer: Douglas Bowman
URL: www.stopdesign.com
Date: 26 Feb 2004
Updated by: Blogger Team
------------------------------------------------ */

/* Variable definitions
====================
<Variable name="bgcolor" description="Page Background Color"
type="color" default="#fff" value="#ffffff">
<Variable name="textcolor" description="Text Color"
type="color" default="#333" value="#333333">
<Variable name="linkcolor" description="Link Color"
type="color" default="#58a" value="#5588aa">
<Variable name="pagetitlecolor" description="Blog Title Color"
type="color" default="#666" value="#666666">
<Variable name="descriptioncolor" description="Blog Description Color"
type="color" default="#999" value="#999999">
<Variable name="titlecolor" description="Post Title Color"
type="color" default="#c60" value="#cc6600">
<Variable name="bordercolor" description="Border Color"
type="color" default="#ccc" value="#cccccc">
<Variable name="sidebarcolor" description="Sidebar Title Color"
type="color" default="#999" value="#999999">
<Variable name="sidebartextcolor" description="Sidebar Text Color"
type="color" default="#666" value="#666666">
<Variable name="visitedlinkcolor" description="Visited Link Color"
type="color" default="#999" value="#999999">
<Variable name="bodyfont" description="Text Font"
type="font" default="normal normal 100% Georgia, Serif" value="normal normal 100% Georgia,

Serif">
<Variable name="headerfont" description="Sidebar Title Font"
type="font"
default="normal normal 78% 'Trebuchet MS',Trebuchet,Arial,Verdana,Sans-serif"

value="normal normal 78% 'Trebuchet MS',Trebuchet,Arial,Verdana,Sans-serif">
<Variable name="pagetitlefont" description="Blog Title Font"
type="font"
default="normal normal 200% Georgia, Serif" value="normal normal 200% Georgia, Serif">
<Variable name="descriptionfont" description="Blog Description Font"
type="font"
default="normal normal 78% 'Trebuchet MS', Trebuchet, Arial, Verdana, Sans-serif"

value="normal normal 78% 'Trebuchet MS', Trebuchet, Arial, Verdana, Sans-serif">
<Variable name="postfooterfont" description="Post Footer Font"
type="font"
default="normal normal 78% 'Trebuchet MS', Trebuchet, Arial, Verdana, Sans-serif"

value="normal normal 78% 'Trebuchet MS', Trebuchet, Arial, Verdana, Sans-serif">
*/

/* Use this with templates/template-twocol.html */

body {
background:$bgcolor;
margin:0;
color:$textcolor;
font:x-small Georgia Serif;
font-size/* */:/**/small;
font-size: /**/small;
text-align: center;
}
a:link {
color:$linkcolor;
text-decoration:none;
}
a:visited {
color:$visitedlinkcolor;
text-decoration:none;
}
a:hover {
color:$titlecolor;
text-decoration:underline;
}
a img {
border-width:0;
}

/* Header
------------------------------------------------
*/

#header-wrapper {
width:660px;
margin:0 auto 10px;
border:1px solid $bordercolor;
}

#header {
margin: 5px;
border: 1px solid $bordercolor;
text-align: center;
color:$pagetitlecolor;
}

#header h1 {
margin:5px 5px 0;
padding:15px 20px .25em;
line-height:1.2em;
text-transform:uppercase;
letter-spacing:.2em;
font: $pagetitlefont;
}

#header a {
color:$pagetitlecolor;
text-decoration:none;
}

#header a:hover {
color:$pagetitlecolor;
}

#header .description {
margin:0 5px 5px;
padding:0 20px 15px;
max-width:700px;
text-transform:uppercase;
letter-spacing:.2em;
line-height: 1.4em;
font: $descriptionfont;
color: $descriptioncolor;
}


/* Outer-Wrapper
------------------------------------------------ */
#outer-wrapper {
width: 750px;
margin:0 auto;
padding:10px;
text-align:left;
font: $bodyfont;
}

#main-wrapper {
width: 400px;
margin-left: 20px;
float: left;
word-wrap: break-word; /* fix for long text breaking sidebar float in IE */
}

#sidebar-wrapper {
width: 150px;
float: right;
word-wrap: break-word; /* fix for long text breaking sidebar float in IE */
}

#newsidebar-wrapper {
width: 150px;
float: left;
word-wrap: break-word; /* fix for long text breaking sidebar float in IE */
}


/* Headings
------------------------------------------------ */

h2 {
margin:1.5em 0 .75em;
font:$headerfont;
line-height: 1.4em;
text-transform:uppercase;
letter-spacing:.2em;
color:$sidebarcolor;
}


/* Posts
------------------------------------------------
*/
h2.date-header {
margin:1.5em 0 .5em;
}

.post {
margin:.5em 0 1.5em;
border-bottom:1px dotted $bordercolor;
padding-bottom:1.5em;
}
.post h3 {
margin:.25em 0 0;
padding:0 0 4px;
font-size:140%;
font-weight:normal;
line-height:1.4em;
color:$titlecolor;
}

.post h3 a, .post h3 a:visited, .post h3 strong {
display:block;
text-decoration:none;
color:$titlecolor;
font-weight:normal;
}

.post h3 strong, .post h3 a:hover {
color:$textcolor;
}

.post p {
margin:0 0 .75em;
line-height:1.6em;
}

.post-footer {
margin: .75em 0;
color:$sidebarcolor;
text-transform:uppercase;
letter-spacing:.1em;
font: $postfooterfont;
line-height: 1.4em;
}

.comment-link {
margin-left:.6em;
}
.post img {
padding:4px;
border:1px solid $bordercolor;
}
.post blockquote {
margin:1em 20px;
}
.post blockquote p {
margin:.75em 0;
}

/* Comments
------------------------------------------------ */
#comments h4 {
margin:1em 0;
font-weight: bold;
line-height: 1.4em;
text-transform:uppercase;
letter-spacing:.2em;
color: $sidebarcolor;
}

#comments-block {
margin:1em 0 1.5em;
line-height:1.6em;
}
#comments-block .comment-author {
margin:.5em 0;
}
#comments-block .comment-body {
margin:.25em 0 0;
}
#comments-block .comment-footer {
margin:-.25em 0 2em;
line-height: 1.4em;
text-transform:uppercase;
letter-spacing:.1em;
}
#comments-block .comment-body p {
margin:0 0 .75em;
}
.deleted-comment {
font-style:italic;
color:gray;
}

#blog-pager-newer-link {
float: left;
}

#blog-pager-older-link {
float: right;
}

#blog-pager {
text-align: center;
}

.feed-links {
clear: both;
line-height: 2.5em;
}

/* Sidebar Content
------------------------------------------------ */
.sidebar {
color: $sidebartextcolor;
line-height: 1.5em;
}

.sidebar ul {
list-style:none;
margin:0 0 0;
padding:0 0 0;
}
.sidebar li {
margin:0;
padding:0 0 .25em 15px;
text-indent:-15px;
line-height:1.5em;
}

.sidebar .widget, .main .widget {
border-bottom:1px dotted $bordercolor;
margin:0 0 1.5em;
padding:0 0 1.5em;
}

.main .Blog {
border-bottom-width: 0;
}


/* Profile
------------------------------------------------ */
.profile-img {
float: left;
margin: 0 5px 5px 0;
padding: 4px;
border: 1px solid $bordercolor;
}

.profile-data {
margin:0;
text-transform:uppercase;
letter-spacing:.1em;
font: $postfooterfont;
color: $sidebarcolor;
font-weight: bold;
line-height: 1.6em;
}

.profile-datablock {
margin:.5em 0 .5em;
}

.profile-textblock {
margin: 0.5em 0;
line-height: 1.6em;
}

.profile-link {
font: $postfooterfont;
text-transform: uppercase;
letter-spacing: .1em;
}

/* Footer
------------------------------------------------ */
#footer {
width:660px;
clear:both;
margin:0 auto;
padding-top:15px;
line-height: 1.6em;
text-transform:uppercase;
letter-spacing:.1em;
text-align: center;
}

/** Page structure tweaks for layout editor wireframe */
body#layout #header {
margin-left: 0px;
margin-right: 0px;
}
]]></b:skin>
</head>

<body>
<div id='outer-wrapper'><div id='wrap2'>

<!-- skip links for text browsers -->
<span id='skiplinks' style='display:none;'>
<a href='#main'>skip to main </a> |
<a href='#sidebar'>skip to sidebar</a>
</span>

<div id='header-wrapper'>
<b:section class='header' id='header' maxwidgets='3' showaddelement='yes'>
<b:widget id='Header1' locked='false' title='Testing Blogger Beta (Header)' type='Header'>
<b:includable id='main'>
<div class='titlewrapper'>
<h1 class='title'>
<b:if cond='data:blog.url == data:blog.homepageUrl'>
<data:title/>
<b:else/>
<a expr:href='data:blog.homepageUrl'><data:title/></a>
</b:if>
</h1>
</div>
<div class='descriptionwrapper'>
<p class='description'><span><data:description/></span></p>
</div>
</b:includable>
</b:widget>
<b:widget id='HTML6' locked='false' title='' type='HTML'>
<b:includable id='main'>
<!-- only display title if it's non-empty -->
<b:if cond='data:title != ""'>
<h2 class='title'><data:title/></h2>
</b:if>
<div class='widget-content'>
<data:content/>
</div>

<b:include name='quickedit'/>
</b:includable>
</b:widget>
</b:section>
</div>

<div id='content-wrapper'>
<div id='newsidebar-wrapper'>
<b:section class='sidebar' id='newsidebar' preferred='yes'>
<b:widget id='HTML3' locked='false' title='' type='HTML'>
<b:includable id='main'>
<!-- only display title if it's non-empty -->
<b:if cond='data:title != ""'>
<h2 class='title'><data:title/></h2>
</b:if>
<div class='widget-content'>
<data:content/>
</div>

<b:include name='quickedit'/>
</b:includable>
</b:widget>
<b:widget id='HTML9' locked='false' title='' type='HTML'>
<b:includable id='main'>
<!-- only display title if it's non-empty -->
<b:if cond='data:title != ""'>
<h2 class='title'><data:title/></h2>
</b:if>
<div class='widget-content'>
<data:content/>
</div>

<b:include name='quickedit'/>
</b:includable>
</b:widget>
<b:widget id='HTML7' locked='false' title='' type='HTML'>
<b:includable id='main'>
<!-- only display title if it's non-empty -->
<b:if cond='data:title != ""'>
<h2 class='title'><data:title/></h2>
</b:if>
<div class='widget-content'>
<data:content/>
</div>

<b:include name='quickedit'/>
</b:includable>
</b:widget>
<b:widget id='Profile1' locked='false' title='About Me' type='Profile'>
<b:includable id='main'>
<b:if cond='data:title != ""'>
<h2><data:title/></h2>
</b:if>
<div class='widget-content'>
<b:if cond='data:team == "true"'> <!-- team blog profile -->
<ul>
<b:loop values='data:authors' var='i'>
<li><a

expr:href='data:i.userUrl'><data:i.display-name/></a></li>
</b:loop>
</ul>

<b:else/> <!-- normal blog profile -->

<b:if cond='data:photo.url != ""'>
<a expr:href='data:userUrl'><img class='profile-img' expr:alt='data:photo.alt'

expr:height='data:photo.height' expr:src='data:photo.url' expr:width='data:photo.width'/></a>
</b:if>

<dl class='profile-datablock'>
<dt class='profile-data'><data:displayname/></dt>

<b:if cond='data:showlocation == "true"'>
<dd class='profile-data'><data:location/></dd>
</b:if>

<b:if cond='data:aboutme != ""'><dd

class='profile-textblock'><data:aboutme/></dd></b:if>
</dl>
<a class='profile-link' expr:href='data:userUrl'>View
my complete profile</a>
</b:if>

<b:include name='quickedit'/>
</div>
</b:includable>
</b:widget>
</b:section>
</div>

<div id='main-wrapper'>
<b:section class='main' id='main' showaddelement='no'>
<b:widget id='HTML5' locked='false' title='' type='HTML'>
<b:includable id='main'>
<!-- only display title if it's non-empty -->
<b:if cond='data:title != ""'>
<h2 class='title'><data:title/></h2>
</b:if>
<div class='widget-content'>
<data:content/>
</div>

<b:include name='quickedit'/>
</b:includable>
</b:widget>
<b:widget id='Blog1' locked='false' title='Blog Posts' type='Blog'>
<b:includable id='main' var='top'>
<!-- posts -->
<div class='blog-posts'>
<b:loop values='data:posts' var='post'>
<b:if cond='data:post.dateHeader'>
<h2 class='date-header'><data:post.dateHeader/></h2>
</b:if>
<b:include data='post' name='post'/>
<b:if cond='data:blog.pageType == "item"'>
<b:if cond='data:post.allowComments'>
<b:include data='post' name='comments'/>
</b:if>
</b:if>
</b:loop>
</div>

<!-- navigation -->
<b:include name='nextprev'/>

<!-- feed links -->
<b:include name='feedLinks'/>
</b:includable>
<b:includable id='nextprev'>
<div class='blog-pager' id='blog-pager'>
<b:if cond='data:newerPageUrl'>
<span id='blog-pager-newer-link'>
<a class='blog-pager-newer-link' expr:href='data:newerPageUrl' expr:id='data:widget.instanceId

+ "_blog-pager-newer-link"' expr:title='data:newerPageTitle'><data:newerPageTitle/></a>
</span>
</b:if>

<b:if cond='data:olderPageUrl'>
<span id='blog-pager-older-link'>
<a class='blog-pager-older-link' expr:href='data:olderPageUrl' expr:id='data:widget.instanceId

+ "_blog-pager-older-link"' expr:title='data:olderPageTitle'><data:olderPageTitle/></a>
</span>
</b:if>

<b:if cond='data:blog.homepageUrl != data:blog.url'>
<a class='home-link' expr:href='data:blog.homepageUrl'>Home</a>
</b:if>

</div>
<div class='clear'/>
</b:includable>
<b:includable id='post' var='post'>
<div class='post uncustomized-post-template'>
<a expr:name='data:post.id'/>
<b:if cond='data:post.title'>
<h3 class='post-title'>
<b:if cond='data:post.link'>
<a expr:href='data:post.link'><data:post.title/></a>
<b:else/>
<b:if cond='data:post.url'>
<a expr:href='data:post.url'><data:post.title/></a>
<b:else/>
<data:post.title/>
</b:if>
</b:if>
</h3>
</b:if>

<div class='post-header-line-1'/>

<div class='post-body'>
<p><data:post.body/></p>
<div style='clear: both;'/> <!-- clear for photos floats -->
</div>
<div class='post-footer'>
<p class='post-footer-line post-footer-line-1'>
<span class='post-author'>
<b:if cond='data:top.showAuthor'>
<data:top.authorLabel/> <data:post.author/>
</b:if>
</span>

<span class='post-timestamp'>
<b:if cond='data:top.showTimestamp'>
<data:top.timestampLabel/>
<b:if cond='data:post.url'>
<a class='timestamp-link' expr:href='data:post.url' title='permanent

link'><data:post.timestamp/></a>
</b:if>
</b:if>
</span>

<span class='post-comment-link'>
<b:if cond='data:blog.pageType != "item"'>

<b:if cond='data:post.allowComments'>
<a class='comment-link' expr:href='data:post.addCommentUrl'

expr:onclick='data:post.addCommentOnclick'><b:if cond='data:post.numComments == 1'>1

<data:top.commentLabel/><b:else/><data:post.numComments/>

<data:top.commentLabelPlural/></b:if></a>
</b:if>
</b:if>
</span>

<!-- backlinks -->
<span class='post-backlinks post-comment-link'>
<b:if cond='data:blog.pageType != "item"'>
<b:if cond='data:post.showBacklinks'>
<a class='comment-link' expr:href='data:post.url +

"#links"'><data:top.backlinkLabel/></a>
</b:if>
</b:if>
</span>

<span class='post-icons'>
<!-- email post links -->
<b:if cond='data:post.emailPostUrl'>
<span class='item-action'>
<a expr:href='data:post.emailPostUrl' title='Email Post'>
<span class='email-post-icon'> </span>
</a>
</span>
</b:if>

<!-- quickedit pencil -->
<b:include data='post' name='postQuickEdit'/>
</span>
</p>

<p class='post-footer-line post-footer-line-2'>
<span class='post-labels'>
<b:if cond='data:post.labels'>
<data:postLabelsLabel/>
<b:loop values='data:post.labels' var='label'>
<a expr:href='data:label.url' rel='tag'><data:label.name/></a><b:if

cond='data:label.isLast != "true"'>,</b:if>
</b:loop>
</b:if>
</span>
</p>

<p class='post-footer-line post-footer-line-3'/>
</div>
</div>
</b:includable>
<b:includable id='postQuickEdit' var='post'>
<b:if cond='data:post.editUrl'>
<span expr:class='"item-control " + data:post.adminClass'>
<a expr:href='data:post.editUrl' title='Edit Post'>
<span class='quick-edit-icon'> </span>
</a>
</span>
</b:if>
</b:includable>
<b:includable id='commentDeleteIcon' var='comment'>
<span expr:class='"item-control " + data:comment.adminClass'>
<a expr:href='data:comment.deleteUrl' title='Delete Comment'>
<span class='delete-comment-icon'> </span>
</a>
</span>
</b:includable>
<b:includable id='backlinkDeleteIcon' var='backlink'>
<span expr:class='"item-control " + data:backlink.adminClass'>
<a expr:href='data:backlink.deleteUrl' title='Delete Backlink'>
<span class='delete-comment-icon'> </span>
</a>
</span>
</b:includable>
<b:includable id='comments' var='post'>
<div class='comments' id='comments'>
<a name='comments'/>
<h4>
<b:if cond='data:post.numComments == 1'>
1 Comment:
<b:else/>
<data:post.numComments/> Comments:
</b:if>
</h4>

<dl id='comments-block'>
<b:loop values='data:post.comments' var='comment'>
<dt class='comment-author' expr:id='"comment-" + data:comment.id'>
<a expr:name='"comment-" + data:comment.id'/>
<b:if cond='data:comment.authorUrl'>
<a expr:href='data:comment.authorUrl'

rel='nofollow'><data:comment.author/></a>
<b:else/>
<data:comment.author/>
</b:if>
said...
</dt>
<dd class='comment-body'>
<b:if cond='data:comment.isDeleted'>
<span class='deleted-comment'><data:comment.body/></span>
<b:else/>
<p><data:comment.body/></p>
</b:if>
</dd>
<dd class='comment-footer'>
<span class='comment-timestamp'>
<a expr:href='"#comment-" + data:comment.id' title='comment permalink'>
<data:comment.timestamp/>
</a>
<b:include data='comment' name='commentDeleteIcon'/>
</span>

</dd>
</b:loop>
</dl>

<p class='comment-footer'>
<a expr:href='data:post.addCommentUrl' expr:onclick='data:post.addCommentOnclick'>Post a

Comment</a>
</p>

<div id='backlinks-container'>
<div expr:id='data:widget.instanceId + "_backlinks-container"'>
<b:if cond='data:post.showBacklinks'>
<b:include data='post' name='backlinks'/>
</b:if>
</div>
</div>
</div>
</b:includable>
<b:includable id='backlinks' var='post'>
<a name='links'/><h4><data:post.backlinksLabel/></h4>
<b:if cond='data:post.numBacklinks != 0'>
<dl class='comments-block' id='comments-block'>
<b:loop values='data:post.backlinks' var='backlink'>
<div class='collapsed-backlink backlink-control'>
<dt class='comment-title'>
<span class='backlink-toggle-zippy'> </span>
<a expr:href='data:backlink.url'

rel='nofollow'><data:backlink.title/></a>
<b:include data='backlink' name='backlinkDeleteIcon'/>
</dt>
<dd class='comment-body collapseable'>
<data:backlink.snippet/>
</dd>
<dd class='comment-footer collapseable'>
<span class='comment-author'><data:post.authorLabel/>

<data:backlink.author/></span>
<span class='comment-timestamp'><data:post.timestampLabel/>

<data:backlink.timestamp/></span>
</dd>
</div>
</b:loop>
</dl>
</b:if>
<p class='comment-footer'>
<a class='comment-link' expr:href='data:post.createLinkUrl'

target='_blank'><data:post.createLinkLabel/></a>
</p>
</b:includable>
<b:includable id='feedLinks'>
<b:if cond='data:blog.pageType != "item"'> <!-- Blog feed links -->
<b:if cond='data:feedLinks'>
<div class='blog-feeds'>
<b:include data='feedLinks' name='feedLinksBody'/>
</div>
</b:if>

<b:else/> <!--Post feed links -->
<div class='post-feeds'>
<b:loop values='data:posts' var='post'>
<b:if cond='data:post.allowComments'>
<b:if cond='data:post.feedLinks'>
<b:include data='post.feedLinks' name='feedLinksBody'/>
</b:if>
</b:if>
</b:loop>
</div>
</b:if>
</b:includable>
<b:includable id='feedLinksBody' var='links'>
<div class='feed-links'>
Subscribe to:
<b:loop values='data:links' var='f'>
<a class='feed-link' expr:href='data:f.url' expr:type='data:f.mimeType'

target='_blank'><data:f.name/> (<data:f.feedType/>)</a>
</b:loop>
</div>
</b:includable>
</b:widget>
</b:section>
</div>

<div id='sidebar-wrapper'>
<b:section class='sidebar' id='sidebar' preferred='yes'>
<b:widget id='HTML2' locked='false' title='' type='HTML'>
<b:includable id='main'>
<!-- only display title if it's non-empty -->
<b:if cond='data:title != ""'>
<h2 class='title'><data:title/></h2>
</b:if>
<div class='widget-content'>
<data:content/>
</div>

<b:include name='quickedit'/>
</b:includable>
</b:widget>
<b:widget id='HTML1' locked='false' title='' type='HTML'>
<b:includable id='main'>
<!-- only display title if it's non-empty -->
<b:if cond='data:title != ""'>
<h2 class='title'><data:title/></h2>
</b:if>
<div class='widget-content'>
<data:content/>
</div>

<b:include name='quickedit'/>
</b:includable>
</b:widget>
<b:widget id='Label1' locked='false' title='Labels' type='Label'>
<b:includable id='main'>
<b:if cond='data:title'>
<h2><data:title/></h2>
</b:if>
<div class='widget-content'>
<ul>
<b:loop values='data:labels' var='label'>
<li>
<b:if cond='data:blog.url == data:label.url'>
<data:label.name/>
<b:else/>
<a expr:href='data:label.url'><data:label.name/></a>
</b:if>
(<data:label.count/>)
</li>
</b:loop>
</ul>

<b:include name='quickedit'/>
</div>
</b:includable>
</b:widget>
<b:widget id='BlogArchive1' locked='false' title='Blog Archive' type='BlogArchive'>
<b:includable id='main'>
<b:if cond='data:title'>
<h2><data:title/></h2>
</b:if>
<div class='widget-content'>
<div id='ArchiveList'>
<div expr:id='data:widget.instanceId + "_ArchiveList"'>
<b:if cond='data:style == "HIERARCHY"'>
<b:include data='data' name='interval'/>
</b:if>
<b:if cond='data:style == "FLAT"'>
<b:include data='data' name='flat'/>
</b:if>
<b:if cond='data:style == "MENU"'>
<b:include data='data' name='menu'/>
</b:if>
</div>
</div>
<b:include name='quickedit'/>
</div>
</b:includable>
<b:includable id='flat' var='data'>
<ul>
<b:loop values='data:data' var='i'>
<li class='archivedate'>
<a expr:href='data:i.url'><data:i.name/></a> (<data:i.post-count/>)
</li>
</b:loop>
</ul>
</b:includable>
<b:includable id='menu' var='data'>
<select expr:id='data:widget.instanceId + "_ArchiveMenu"'>
<option value=''><data:title/></option>
<b:loop values='data:data' var='i'>
<option expr:value='data:i.url'><data:i.name/>

(<data:i.post-count/>)</option>
</b:loop>
</select>
</b:includable>
<b:includable id='interval' var='intervalData'>
<b:loop values='data:intervalData' var='i'>
<ul>
<li expr:class='"archivedate " + data:i.expclass'>
<b:include data='i' name='toggle'/>
<a class='post-count-link' expr:href='data:i.url'><data:i.name/></a>
(<span class='post-count'><data:i.post-count/></span>)
<b:if cond='data:i.data'>
<b:include data='i.data' name='interval'/>
</b:if>
<b:if cond='data:i.posts'>
<b:include data='i.posts' name='posts'/>
</b:if>
</li>
</ul>
</b:loop>
</b:includable>
<b:includable id='toggle' var='interval'>
<b:if cond='data:interval.toggleId'>
<b:if cond='data:interval.expclass == "expanded"'>
<a class='toggle' expr:href='data:widget.actionUrl + "&action=toggle" +

"&dir=close&toggle=" + data:interval.toggleId + "&toggleopen=" + data:toggleopen'>
<span class='zippy toggle-open'>▼ </span>
</a>
<b:else/>
<a class='toggle' expr:href='data:widget.actionUrl + "&action=toggle" +

"&dir=open&toggle=" + data:interval.toggleId + "&toggleopen=" +

data:toggleopen'>
<span class='zippy'>► </span>
</a>
</b:if>
</b:if>
</b:includable>
<b:includable id='posts' var='posts'>
<ul class='posts'>
<b:loop values='data:posts' var='i'>
<li><a expr:href='data:i.url'><data:i.title/></a></li>
</b:loop>
</ul>
</b:includable>
</b:widget>
<b:widget id='LinkList1' locked='false' title='Blogger Resources' type='LinkList'>
<b:includable id='main'>

<b:if cond='data:title'><h2><data:title/></h2></b:if>
<div class='widget-content'>
<ul>
<div id='link'>
<b:loop values='data:links' var='link'>
<li><a expr:href='data:link.target'

target='_blank'><data:link.name/></a></li>
</b:loop>
</div>
</ul>
<b:include name='quickedit'/>
</div>
</b:includable>
</b:widget>
</b:section>
</div>

<!-- spacer for skins that want sidebar and main to be the same height-->
<div class='clear'> </div>

</div> <!-- end content-wrapper -->

<div id='footer-wrapper'>
<b:section class='footer' id='footer'>
<b:widget id='HTML8' locked='false' title='' type='HTML'>
<b:includable id='main'>
<!-- only display title if it's non-empty -->
<b:if cond='data:title != ""'>
<h2 class='title'><data:title/></h2>
</b:if>
<div class='widget-content'>
<data:content/>
</div>

<b:include name='quickedit'/>
</b:includable>
</b:widget>
<b:widget id='HTML4' locked='false' title='' type='HTML'>
<b:includable id='main'>
<!-- only display title if it's non-empty -->
<b:if cond='data:title != ""'>
<h2 class='title'><data:title/></h2>
</b:if>
<div class='widget-content'>
<data:content/>
</div>

<b:include name='quickedit'/>
</b:includable>
</b:widget>
</b:section>
</div>

</div></div> <!-- end outer-wrapper -->
</body>
</html>

Wednesday, September 13, 2006

Adding a graphic to your blog header

Update 25 September 2008: The very nice graphic at Guide to Malaysia has been replaced by a leaderboard ad unit from Nuffnang. When there are no incoming ad, the ad unit is minimized to a tiny logo Nuffnang logo.


For an example of a Blogger Beta blog with a graphic above the header, surf to Cheap Airfares: Air Asia, Malaysia's success story and Testing Expandable Post Summary (close new windows to get back to this page). The difference between the two is that the image in the first example is clickable whereas the image in the second example is non-clickable. If you are in the archives or in an individual post page of the first example, clicking on the graphic will take you back to the main (home or index) page (or any other sites you choose, depending on what you want). Try clicking on the graphic in the first example and see where it takes you.

Adding a "Add a Page Element" (Page Element is now called Gadget) widget in the Blogger Beta Layout

This is how you can add a graphic to your header. Sign into Dashboard. For the blog you want to modify, click LAYOUT, then click EDIT HTML. Then look for this block of codes in the template:

<div id='header-wrapper'>
<b:section class='header' id='header' maxwidgets='1' showaddelement='no'>
<b:widget id='Header1' locked='true' title='Replacing Blog Header (Header)' type='Header'/>
</b:section>
</div>


Change maxwidgets='1' to maxwidgets='4'(or any other number greater than 1, or even leave a number out, then there is no maximum) and change showaddelement='no' to showaddelement='yes'. (you may also leave out the figure in maxwidgets='' in which case the number of widgets you can add to the header is unlimited). So the section should now be

<div id='header-wrapper'>
<b:section class='header' id='header' maxwidgets='4' showaddelement='yes'>
<b:widget id='Header1' locked='true' title='Replacing Blog Header (Header)' type='Header'/>
</b:section>
</div>


Click SAVE TEMPLATE. Then click PAGE ELEMENT tab to go back to LAYOUT. You will see an extra "Add a Page Element" above the Header.

Adding unclickable graphic in the Header of Blogger beta blog

Click "Add a Page Element" and a pop-up will appear. Select "Picture" and click "Add to blog". In the next page, there will be 4 fields and some radio buttons for you to click. The fields are "Title", "Caption" and two fields for image. It is best to leave the title blank. If (rarely) you want a caption below the image, then fill in that field with your caption, otherwise leave it blank. If you have your photo stored on your computer, click "Browse" (the radio button for "Browse" is already ticked by default), then select the photo from your computer.

You may also tick the radio button to load an image already hosted on the web if you know the URL, but if the image is not hosted by you, there may be copyright and bandwidth issues involved. If you select this option, just fill in the field for the image URL and click "Save changes". For this, the safest option is to tick "Shrink to fit" as you have no control over the size of the photo.

The advantage of this is you don't have to deal with any HTML, but the disadvantage is that the image is not clickable like in the first example: Testing expandable post summary (close new window to get back to this page).

Adding a clickable graphic to the Blogger Beta blog Header

There is another way to add a graphic to the header. First, you need to host your image somewhere on the web. You can host it with Photobucket (close new window to get back to this page) or you can host it with Blogger. If you want to host it with blogger, look at post Getting Blogger to host your pictures for your profile, etc. (close new window to get back to this page). You may be interested to read about a comparison between the two methods here: Comparison between hosting images with Blogger and with Photobucket (close new window to get back to this page).

You may also use Google Page Creator to host the image. After uploading the image, click on the link then copy the URL from the address bar in the page hosting the image (or right-click on the mouse and select "copy shortcut" to save the URL into clipboard.

Non-clickable image Header

Have ready the URL of the image. Now when you click "Add a Page Element", instead of selecting "Picture" select "HTML/Javascript" instead and click ADD TO BLOG. Then type <img src="URL of picture" width="W" alt="" /> into the HTML editor, where W is the width of the image you want displayed. This will have to be equal or less than the width of the sidebar. If you don't know the width of the sidebar, get to the template editor (click LAYOUT > TEMPLATE > EDIT HTML) and look for this block of codes

#sidebar-wrapper {
width: 150px;
float: right;
word-wrap: break-word; /* fix for long text breaking sidebar float in IE */
}

This tells me the width of the sidebar is 150 pixels.

It will be good to type in some description of the image in between the quotation marks in alt="" as search engine cannot read images but can read the text in the alt tag. This will be an advantage to you if you want your blog to be easily found by search enginges. Another advantage is that if for any reason, the image cannot be displayed, instead of a blank box, the text withing the quotation marks will be displayed instead. The alt tag is optional and you may leave it out if you want. But putting some description between the quotation marks will be good for search engine which cannot read images, but can read the alt text. Also, if the image cannot be displayed for any reason, the text get displayed instead.

When ready, click SAVE CHANGES. Then in the LAYOUT, preview if you want, and click SAVE if you are satisfied. If you are not satisfied with the positioning of the elements, you can hover your mouse over the widget (then the cursor will change to a cross) and drag it to wherever you like.

Clickable Image Header

However, doing it in the manner above will still leave you with an unclickable graphic. If you want the image to be clickable so that it takes you back to the home page (or any other site you wish), you will have to write the image HTML this way:
<a href="URL of home page"><img src="picture URL" width="W" alt="" /></a>. This was the method used for the first example blog.

Adding other stuff to the Header

Note: Instead of just adding a graphic to the header for this blog, you can use the same method to add other things like text, etc. For example, to make a "sticky post" that always stay at the top of the page. You can do it the same way except that after clicking "Add a Page Element", for text, you have to choose TEXT and click "Add to blog". I have also tried adding an AdSense link unit to this beta blog Business, Travel and Leisure (cloce new window to get back to this page). The last time I did it, it didn't work unless I tamper with the script and remove the comment tags, but this time, it worked perfectly without having to change the script. Try it yourself. I have also tried to add a Google searchbar this way, but it still ended up with a non-working searchbar. To add a working searchbar, see this post: Putting a working Google AdSense searchbar in the Header of a Blogger Beta blog (close new window to return to this page).

Update. Putting the script for the Google AdSense search box directly now will result in a working search box. You don't have to do any tinkering.

Making a graphic


For the graphic I made at Guide to Malaysia, I just took a 640x480 pixels photo, crop it to size with the very good and free Irfanview, save and uploaded to photobucket. If you want a fancier graphic header, here is a very good tutorial that shows you how to do it with Photoshop: How to make a blog header graphic (close new window to get back to this page)

For the simple header in the second example "Good Health Information", I just use the very good and free Irfanview to make the graphic. For those not famalier with how to do it, I think I will do a post on that. When I do, I will add a link to that post here.

Getting rid of the text header

I personally believe that having a text header and a description in the header is good for search engine purpose, and I personally would not want to remove it. One of my blog reader did it this way. He retained the text header, but reduced its size to 1 pixel.

Now if despite what I said, you still desparately want to remove the header, as someone just commented, it can be done. Get into the template editor, and look for this block of code:

<div id='header-wrapper'>
<b:section class='header' id='header' maxwidgets='1' showaddelement='no'>
<b:widget id='Header1' locked='true' title='Testing Header Removal (Header)' type='Header'/>
</b:section>
</div>


Change locked='true' to locked='false' (To add the graphic header, you would already have changed maxwidgets='1' showaddelement='no' to maxwidgets='' showaddelement='yes').

If you do this, to remove the text header, click EDIT in the Page Element for the text header, click "Remove Page Element" and the text header (plus any description) will be remove. (see screenshot below)
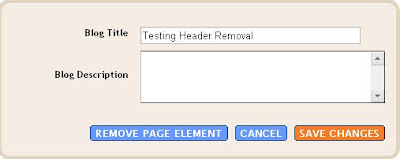
Page Element: text header removal

Update: If you want the text title to be incorporated into the image, it is better to add the image as a background, making sure the image and the text have contrasting color. See Adding an image as background for the blog Header. Alternatively, you can use the method described in this post Special fonts for your blog clickable graphic header without deleting the text title

Monday, September 04, 2006

3 column template for New Blogger (previously Blogger Beta)

Update 17 July 2007: Informed by Ramani that there are some changes in his Hackosphere site. Don't know how it will affect downloading of his template which is used for this blog. In any case, you can get a modified version (blog Header widened to same width as rest of content plus additonal "Add a Page Element" in the Header section and the Main Column (posts) section of the LAYOUT by joining Google group Photostore. It was somehow set up as a private group, but I think I will leave its status as it is. You just join and you will be approved as a member to get access. Thought it will help me keep track of how many bloggers are interested in the template. Alternatively, you can email me, but the other option is better. You can then come back to read the rest of the post. The part about the warning of widgets getting deleted is normal. What you should do is to backup your template Backing up and changing New Blogger template. I need to update that post to inform readers that it is a good idea to edit the Page Elements one by one and saving them in Notepad files. Some Page Elements like Link List cannot be backed up.


Update 7 April 2007: There are other Hackosphere 3 column New Blogger templates: New Blogger 3 column templates modified by Ramani of Hackosphere

Other New Blogger 3 column templates:

New Blogger template modified by Stavanger

Dots New Blogger template with Header

New Blogger templates by Isnaini

New Blogger templates by Thur

Ramani's New Blogger Neo template

New Blogger template by FinalSense (note: blogs using these templates will have no navbar)

NOTE: I have noticed that some search engines have directed search with the search terms "blogger 3 column template" to this page. If you are looking for a 3 column template for the Blogger classic blog, you will have to refer to this blog Blogger template tutorial - 3 column template


Ramani of Hack-O-Sphere has a cool hack for a 3 column template for Blogger Beta. You can find it here: 3 column templates for Blogger Beta.

I have tested it. Initially, I copy the script from his site and pasted it into notepad, then the template editor, and that resulted in an error message: "XML error message: The document type declaration for root element type "html" must end with '>'." (See update below). It turns out I have to follow exactly the instruction, download the file into my computer (right-click, "Save target as". I downloaded it as an XML file), then upload it into Blogger Beta. That resulted in a message: "Please confirm that the following widgets should be deleted. All the widgets' configuration data will be lost.
HTML1".
When I tried it earlier for another Beta Blog, the message was even longer:
HTML5
HTML4
HTML1
HTML2
HTML3
Label1
but looks like Blogger Beta is undergoing a lot of improvements). Also, in the resulting blog, the labels were missing from the sidebar. This, however, was easily rectified, as Labels could be added back using the "Add a Page Element" for the sidebars.

Update: Contacted Ramani about the XML error message. He responded that if we use notepad, we have to ensure that word-wrap is disabled.

To see the result, have a look at this blog which have been converted to a 3 column Minima Blogger Beta template: Star Home Improvements

NOTE: I have noticed that some search engines have directed search with the search terms "blogger 3 column template" to this page. If you are looking for a 3 column template for the Blogger classic blog, you will have to refer to this blog Blogger template tutorial - 3 column template

